Ruleset Editor
The Ruleset Editor can be generated from DVT Eclipse by going to the Verissimo menu and then going to Ruleset Editor…, from DVT for VSCode by opening the Command Palette and using Verissimo: Ruleset Editor... or by using the batch mode flag ‘-ruleset_editor’.
The commands in the GUI will prompt the choice to either Create new ruleset or to Load existing ruleset…. For the batch mode adding the ‘-ruleset’ flag followed by the path to a ruleset XML file will load that ruleset.
The Ruleset Editor has 2 modes.
The Rule Select Mode.
The Rule Edit Mode.
When the editor is used to create a new ruleset, the Rule Select Mode is active at start. When the editor is used to modify an existing ruleset, the Rule Edit Mode is active at start. To switch between modes, the top-left corner buttons can be used.
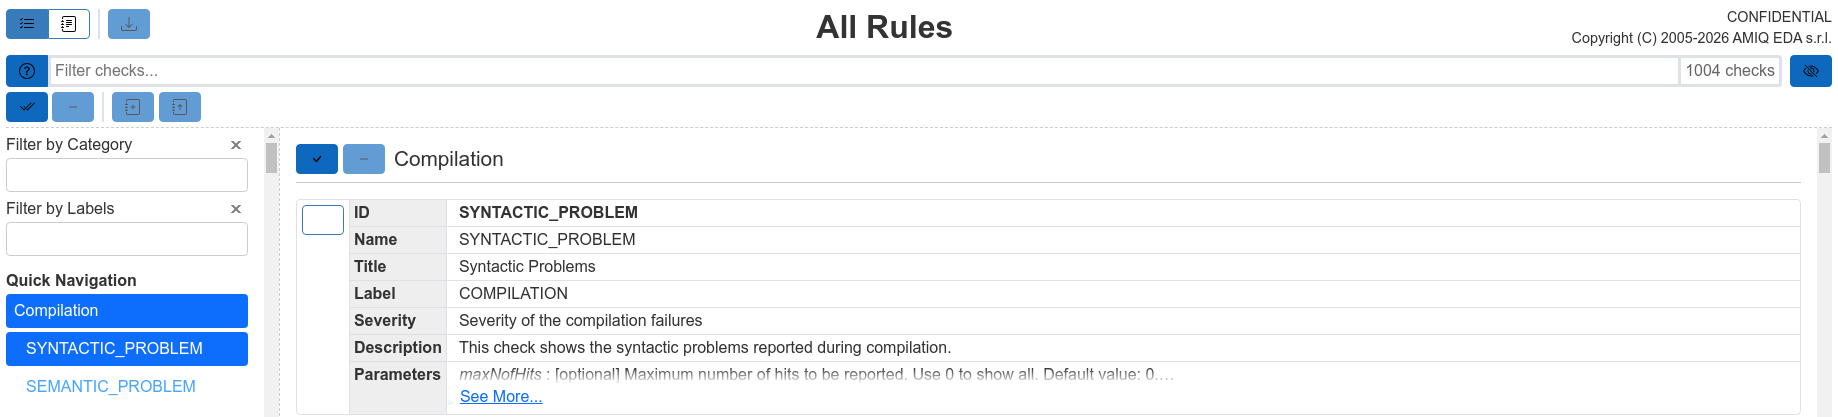
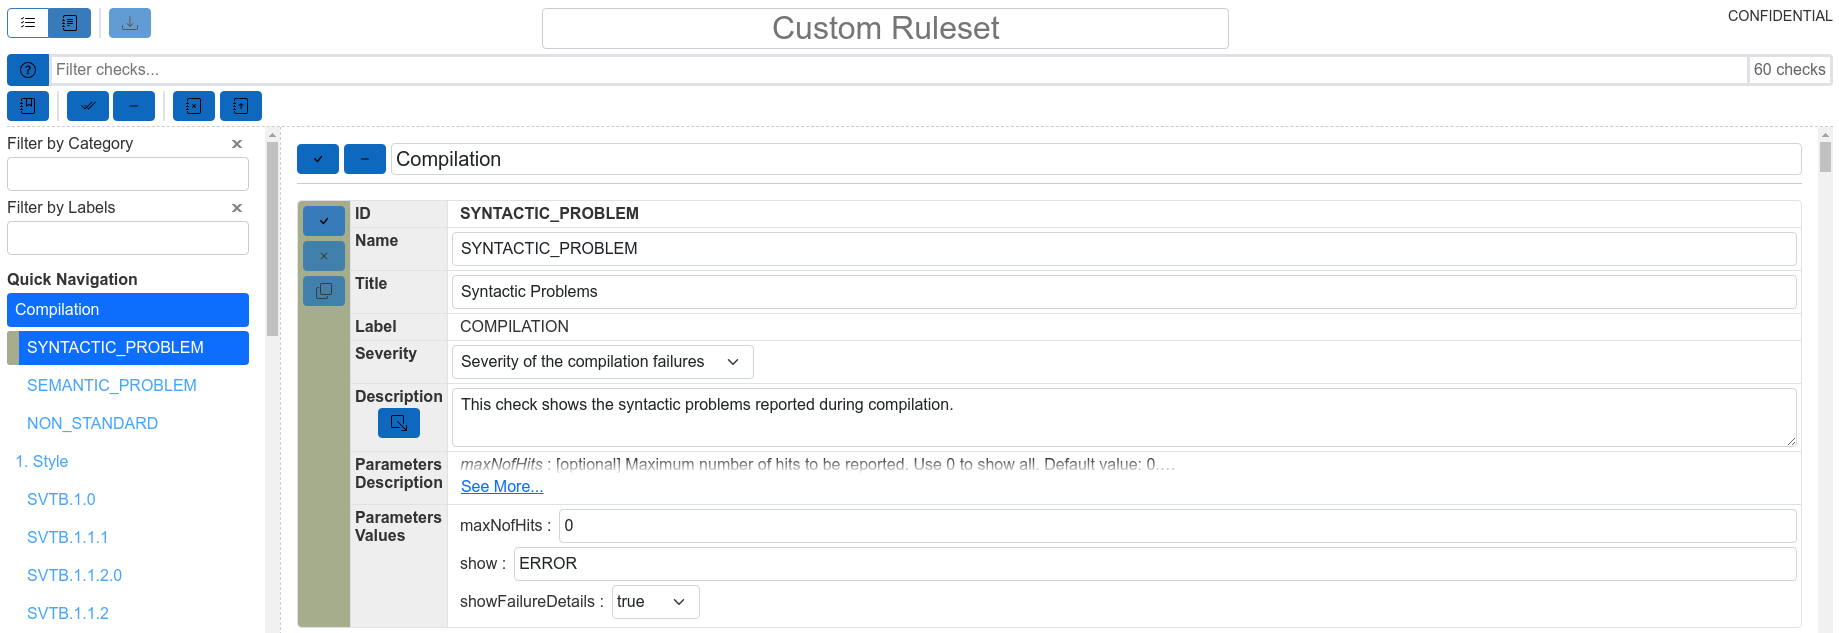
Rule Select Mode
The Rule Select Mode can be used to choose the rules in the generated custom ruleset.
Available Buttons
Icon |
Tooltip Name |
Description |

|
Rule Edit Mode |
Changes the current mode to the Rule Edit Mode. |

|
Generate Ruleset |
Generates the ruleset XML file that can be downloaded. Is enabled only when there are rules in the ruleset. |

|
Hide previously Added Rules |
Hides all the rules that have previously been added to the ruleset. |

|
Show previously Added Rules |
Shows all the rules that have previously been added to the ruleset. |

|
Select All Rules |
Selects all the displayed rules. |

|
Select Category |
Selects all the displayed rules in the category. |
|
|
Select/Deselect Rule |
Selects/Deselects the rule. |
Once a rule is selected, several other buttons become enabled.
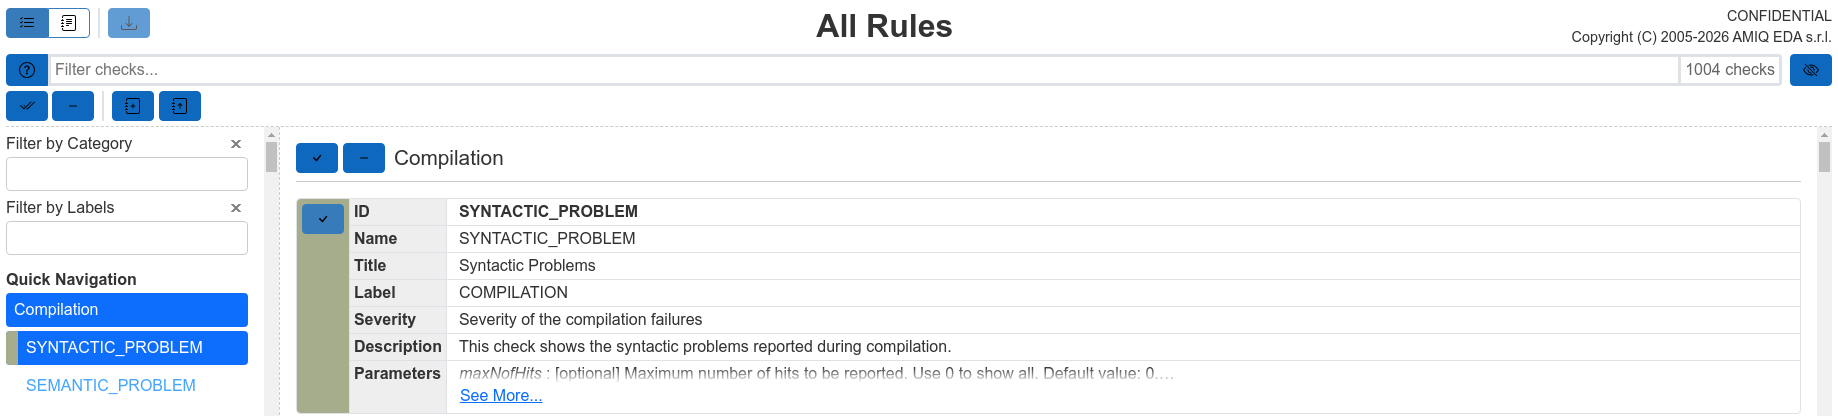
Available buttons when at least a rule is selected
Icon |
Tooltip Name |
Description |

|
Add to Ruleset |
Adds each rule from the current selection of rules to its default category. |

|
Add to Ruleset… |
Adds all rules from the current selection of rules to a chosen category. |

|
Deselect All Rules |
Clears all of the displayed rules from the current selection. |
|
|
Deselect Category |
Clears the displayed rules from the current selection, for the corresponding category. |
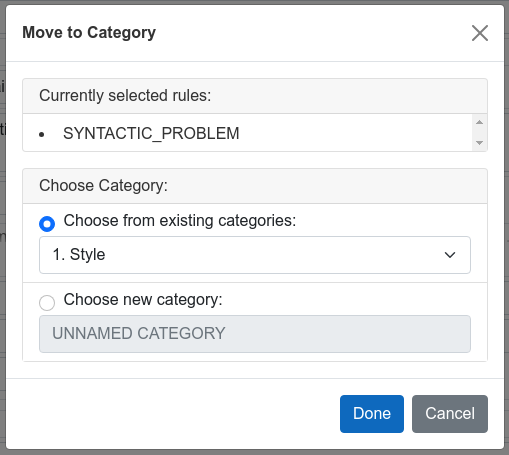
Upon clicking the Add to Category button, a dialog is displayed, allowing the user to select the category to which the currently selected rules should be added.
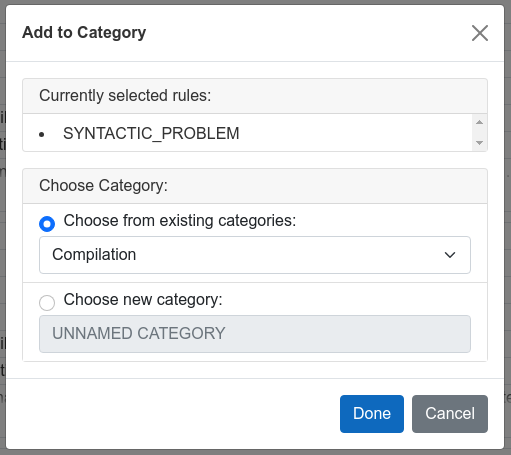
Available Options
Choose from existing categories: Allows the user to choose a category from the predefined categories or from previously added custom categories.
Choose new category: Adds all the rules in the current selection to a new category, for which the name can be specified in the input field.
Press Done to finish adding the rules in the specified category, or press Cancel to modify the current selection of rules.
Once a rule is added, it changes color and it can no longer be selected.

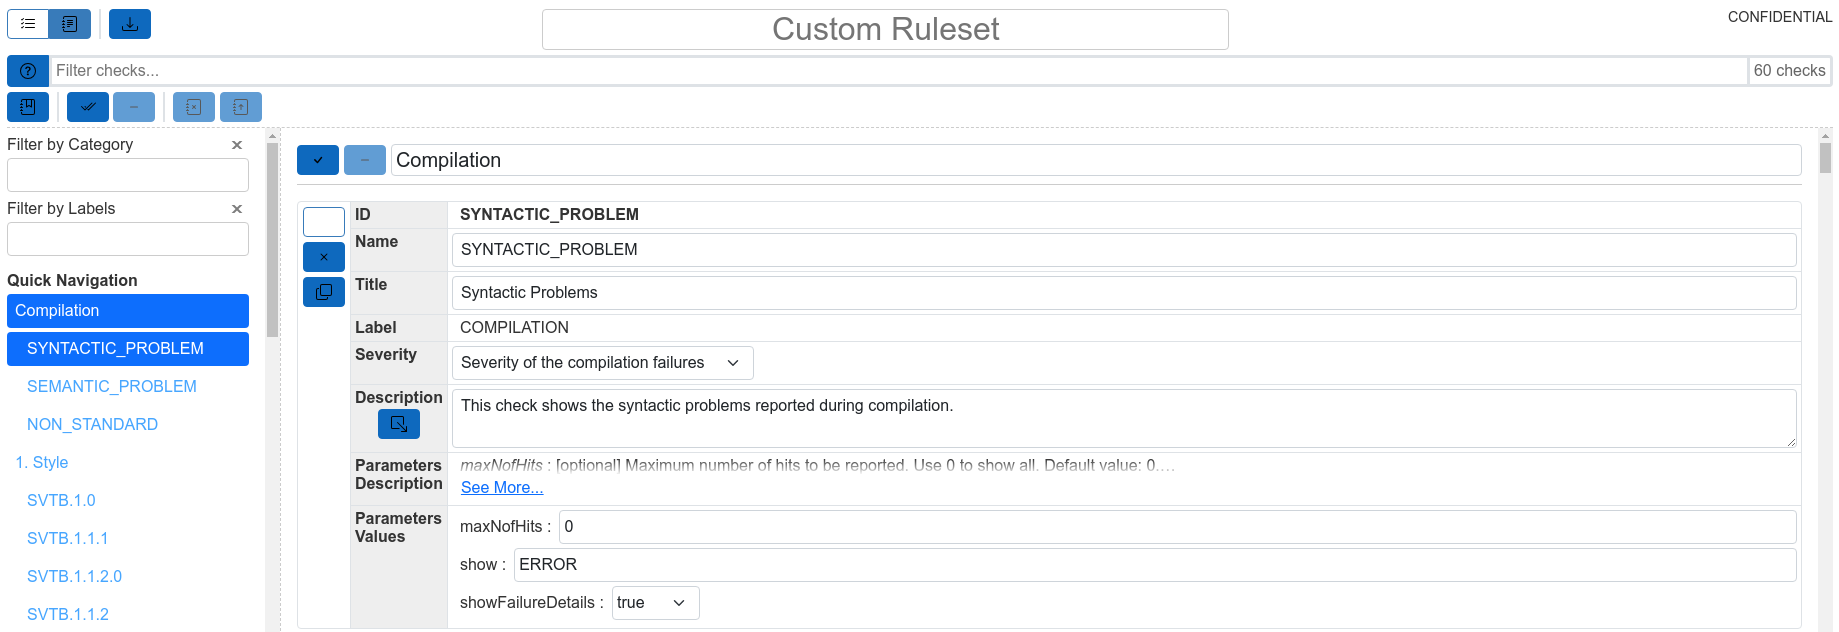
Rule Edit Mode
The Rule Edit Mode can be switched to by clicking the Rule Edit Mode button.
Available Buttons
Icon |
Tooltip Name |
Description |

|
Rule Select Mode |
Changes the current mode to the Rule Select Mode. |
|
|
Generate Ruleset |
Generates the ruleset XML file that can be downloaded. Is enabled only when there are rules in the ruleset. |

|
Edit Configuration |
Edit the configuration of the ruleset. See Configuration Area for more details. |
|
|
Select All Rules |
Selects all the displayed rules. |
|
|
Select Category |
Selects all the displayed rules in the category. |
|
|
Select/Deselect Rule |
Selects/Deselects the rule. |

|
Remove Rule |
Removes the rule from the Custom Ruleset. |

|
Duplicate Rule |
Duplicates the rule and sets a different name for the duplicate. |
Once a rule is selected, several other buttons become enabled.
Available Buttons when at least a rule is selected
Icon |
Tooltip Name |
Description |

|
Remove rules |
Removes the current selection of rules from the Custom Ruleset. |
|
|
Move to Category… |
Moves the current selection of rules to a chosen category. |
|
|
Deselect All Rules |
Clears all of the displayed rules from the current selection. |
|
|
Deselect Category |
Clears the displayed rules from the current selection, for the corresponding category. |
Upon clicking the Move to Category button, a dialog is displayed, allowing the user to change the category of the current selection of rules.
Available Options
Choose from existing categories: Allows the user to choose a category from the categories already in the Custom Ruleset.
Choose new category: Adds all the rules in the current selection to a new category, for which the name can be specified in the input field.
Press done to finish changing the category, or press cancel to modify the current selection of rules.
The customization of the rule can be done using the input fields in the table of the rule.
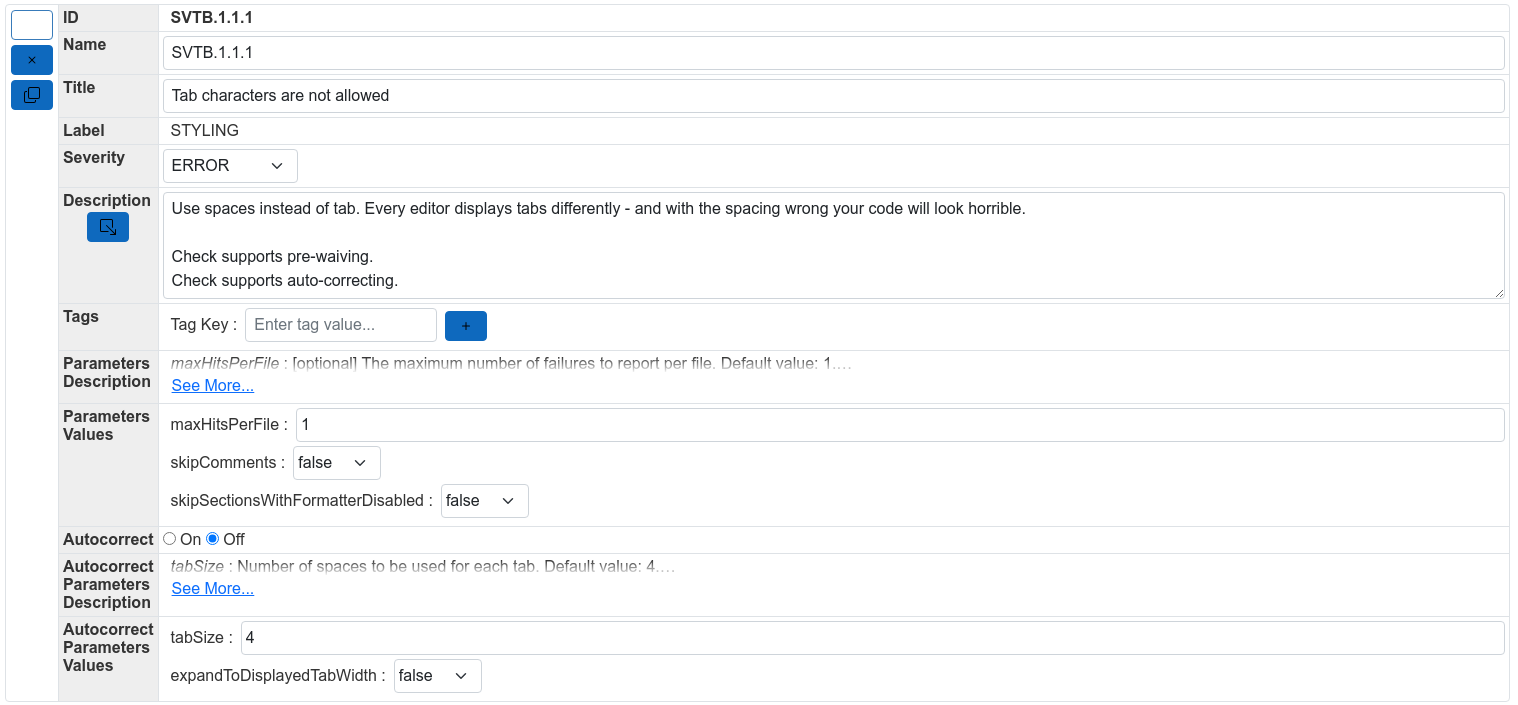
Customizable fields
Name: Set the name of the rule. See Ruleset File Syntax (XML) for more details.
Title: Set the title of the rule. See Ruleset File Syntax (XML) for more details.
Severity: Set the severity of the rule. Default is ERROR. See Ruleset File Syntax (XML) for more details.
Description: Set or modify the description of the rule.
Description Append: Append any additional information to the description of the rule. Use the button in the Description table row to hide/show the Description Append row.
Tags: Set tag values for tag keys. Only appears if there is a tag annotation specified in the Configuration area.
Parameters Values: If existing, set the values for the parameters. Each parameter is pre-filled with the default value. More details regarding each parameter can be found in the Parameters Description row of the table.
Autocorrect: If existing, specify whether to perform the auto-correct for the rule when running Verissimo from the command line.
Autocorrect Parameters Values: If existing, set the values for the auto-correct parameters. Each auto-correct parameter is pre-filled with the default value. More details regarding each auto-correct parameter can be found in the Autocorrect Parameters Description row of the table.
Configuration Area
Available Buttons
Icon |
Tooltip Name |
Description |

|
Add new Annotation |
Adds a new annotation. |
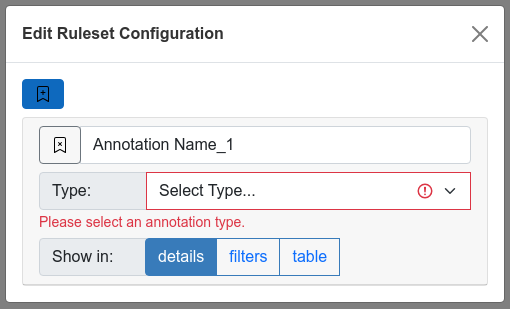
Annotation
Name: Use the input field to set the name of the annotation.
Type: Choose the annotation type. Choose between FS, GIT, P4, SVN, CC, TAG and LABEL. See Ruleset File Syntax (XML) for more details.
Additional field: Only appears the after annotation type is specified. Depending on the annotation type, select the additional field value. See Ruleset File Syntax (XML) for more details.
Show In: Choose where the annotation will appear.
Delete: Use the Remove Annotation button in the top-left corner of the annotation area to delete the annotation.
Generation Preferences
Before generating the ruleset XML file, select the preferences used for generating the ruleset XML file.
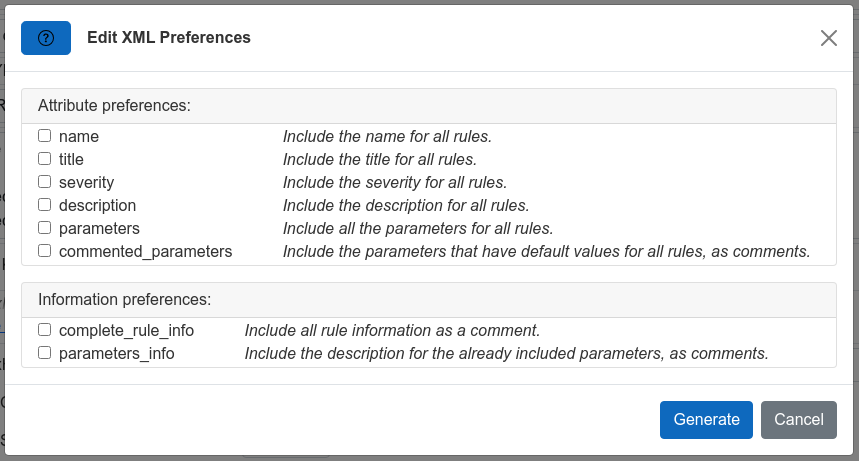
By default, attributes for each rule are added to the ruleset only if they do not have the default value.
You can choose to add attributes that have the default value for all rules by checking the attribute preferences. You can choose to add additional information for all rules by checking the information preferences.